A well-fitted road bike is the foundation of a great riding experience—it not only helps you ride faster but also keeps you comfortable, encouraging you to become a lifelong cyclist. New riders, or those increasing their mileage, often go through an adjustment period as the body adapts to new stresses on muscles and joints. Some mild discomfort is normal, but it’s important to distinguish between normal muscle adaptation and signs of potential injury. If you experience persistent pain, it may mean your bike setup doesn’t match your body’s needs.
Fortunately, you can optimize key contact points—such as frame size, saddle height, and handlebar position—to build a comfortable, efficient riding position. This guide breaks down the core elements of bike fit, helping you prevent injury and enjoy every ride.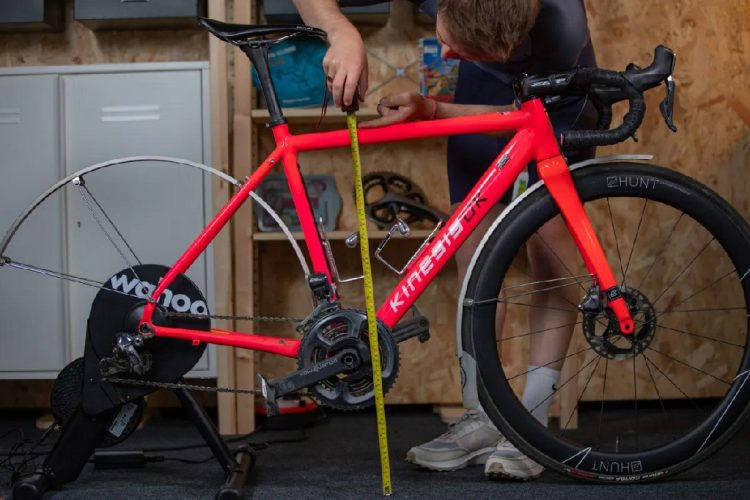
1. Choose the Right Frame Size
Start by making sure your bike frame is the right size.
Road bike frames are usually sized in centimeters or using small, medium, and large labels.
Regardless of the sizing system, the functional length of the riding triangle—the distance from the saddle to the handlebars—is what matters most.
Most bike brands provide sizing charts online.
Stack (vertical height) and Reach (horizontal length) are key frame measurements to compare.
While frame size offers a good starting point, it may not suit your individual proportions.
Also pay attention to standover height—you should have a few centimeters of clearance between the top tube and your body when standing over the bike.
2. Select the Right Saddle
Choosing the right saddle is essential for comfort.
Saddles are designed to support different riding positions, which affect pressure distribution.
On a hybrid or city bike, you sit more upright, with weight on your sit bones. On a road bike, a lower handlebar position rotates the pelvis forward, shifting pressure toward the front.
Many saddle manufacturers label their products for intended use. Your local bike shop can also offer guidance.
Traditional saddles are longer, but shorter-nosed designs are increasingly popular. A short-nose saddle can improve stability and comfort in an aggressive, low riding position.
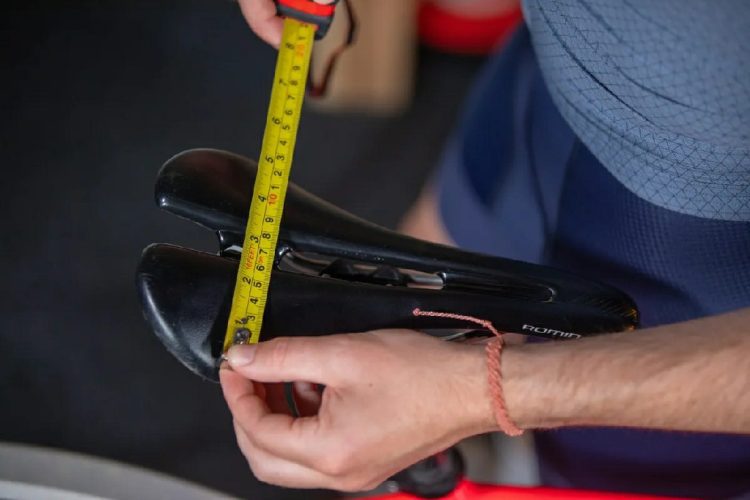
3. Get the Saddle Width Right
Most brands offer saddles in multiple widths to match different sit bone spacings.
Some saddles are gender-specific, designed around typical anatomical differences, while others are unisex.
Try different shapes and widths to see what feels best—personal preference plays a big role.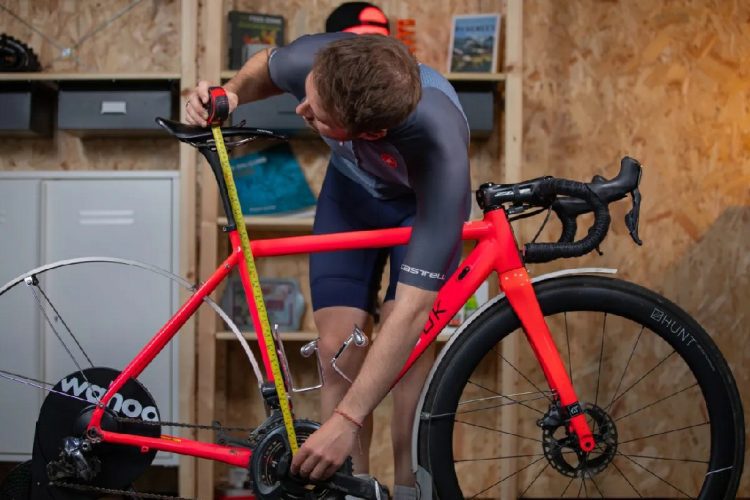
4. Set Your Saddle Height
Saddle height is one of the most important adjustments.
When the pedal is at the bottom of the stroke, your knee should be slightly bent.
A simple way to set saddle height:
- Place your heel on the pedal
- Pedal slowly backward
- At the furthest point, your leg should be fully straight
If you have to point your toes a lot to reach the pedal, the saddle may be too high.
Signs your saddle is too high:
- Hips rocking side to side
- Ankles dropping excessively (>15°)
- Feeling a stretch in your hamstrings
Lower the saddle 2–3 mm at a time to find the ideal height.
If you can’t extend your leg fully at the bottom of the stroke, the saddle may be too low.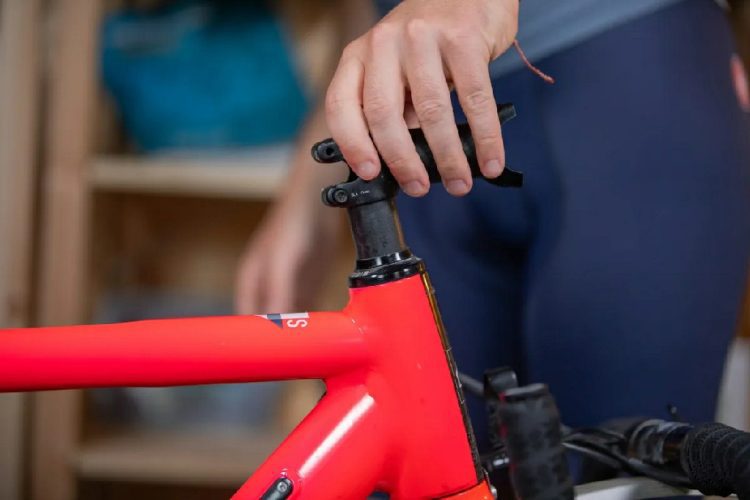
Saddle Fore/Aft Position
Slide the saddle forward or backward on its rails so that when the crank is at the 3 o’clock position, your forward knee is directly over the pedal spindle.
This optimizes pedaling efficiency.
Crank length and cleat position also influence this.
Keep the saddle level in most cases.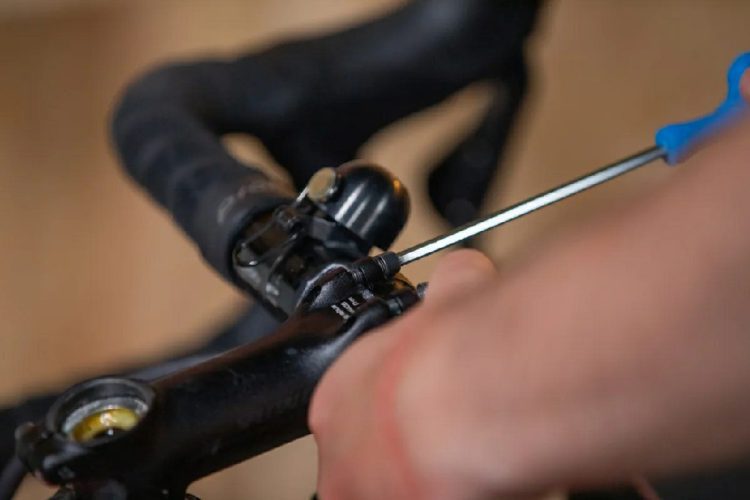
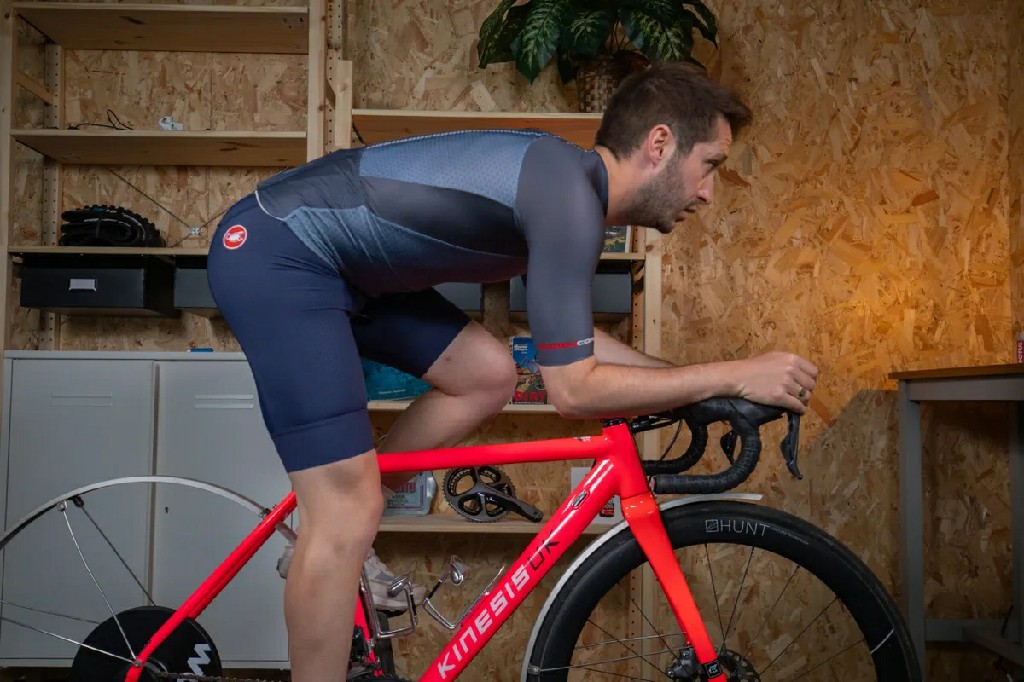
5. Adjust Your Handlebars
Handlebar position greatly affects bike handling and comfort.
You can raise or lower the bars by adding or removing spacers under the stem.
For speed and performance, a lower bar position improves aerodynamics.
For all-day comfort, a higher position reduces strain on your back, neck, and arms.
Start from the factory setting and make small changes from there.
Your ideal handlebar position should allow:
- A natural reach to the brake hoods
- A relaxed back without rounding or arching
- Easy access to the brakes and shifters
Common Pain & Adjustments
- Shoulder/neck pain → Shorten the stem or raise the bars
- Lower back pain → Check if bars are too low or saddle too high
- Pain between shoulder blades → Bars may be too high or saddle too low

6. Fine-Tune Reach and Stem Length
A good riding position lets you reach the bars comfortably—not overstretched or too cramped.
Many bike shops offer stem fitting services.
If you need to change stem length by more than 20 mm, the frame size may be wrong.
Handlebar height vs. reach:
- Lowering the bars → increases effective reach (more aggressive)
- Raising the bars → reduces reach (more upright)
Important: Don’t move your saddle forward to compensate for short reach. Set saddle position based on pedaling mechanics, then adjust handlebar reach separately via stem length or angle.
Brake and Shifter Setup
Make sure you can comfortably reach and operate the brakes and shifters.
Shifters should blend smoothly with the handlebar curve, allowing easy one-finger operation.
Minor adjustments may require unwrapping bar tape and rotating the shifters slightly.
If you have smaller hands, you may need to adjust brake lever reach.
Many modern shifters offer a reach adjustment screw. Some models also allow lever angle adjustment for a more natural wrist position.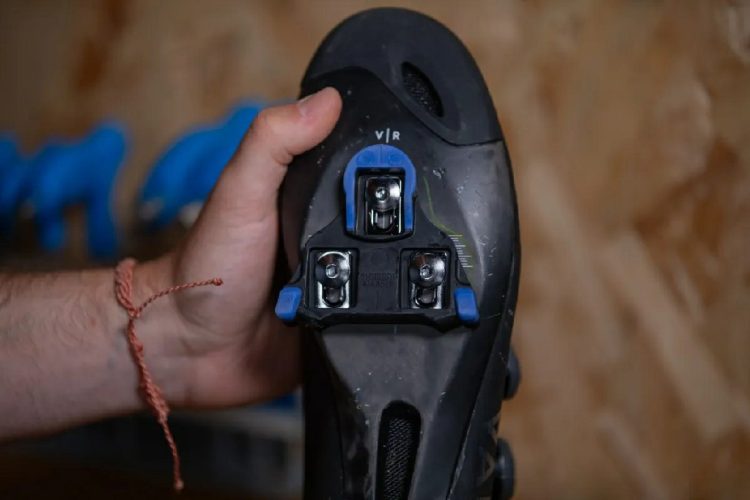
7. Install Pedals and Align Cleats
Cleat positioning affects knee and foot comfort.
Misaligned cleats can cause knee pain or hot spots on the foot.
Cleats often allow some rotational float—generally 5–10 degrees—which helps prevent joint strain.
Flat Pedals vs. Clipless
While most road riders prefer clipless pedals for better power transfer, flat pedals have advantages for:
- Beginners learning bike handling
- Commuting or casual rides
- Riders recovering from foot injuries
Choose the system that matches your riding style.
8. Final Tweaks and Refinements
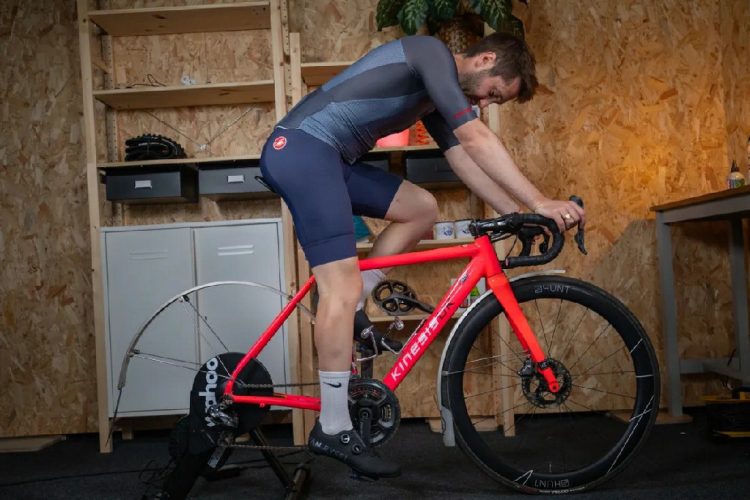
A properly fitted bike should let you ride for hours in a balanced, supported posture.
You should be able to see the road ahead clearly and check traffic to the side without straining.
Listen to your body. If you’re consistently uncomfortable, something needs adjustment.
Bike fitting is a process of fine-tuning based on feel and feedback.
The goal is a bike that feels like an extension of your body—freeing you to enjoy the ride, not fight the machine.

